PowerPoint - Record a Voice-over PowerPoint Presentation
Learn how to record a presentation slide by slide using Microsoft PowerPoint. This is a great option for guest lecturers who don't have access to Panopto.
1. Open or create a PowerPoint presentation.
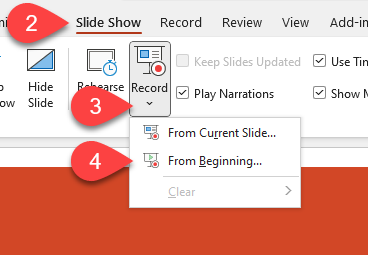
2. Click the Slide Show menu item.
3. Click the dropdown under Record .
4. Select to From Current Slide or From Beginning.
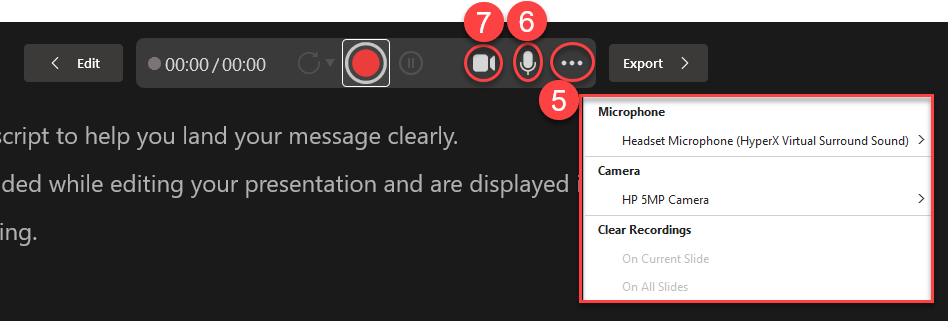
5. Select the ... from the top of the screen and ensure you have the correct microphone and webcam selected.
6. Unmute the microphone if it has a line through it.
7. Turn on the webcam if you want to include your video.
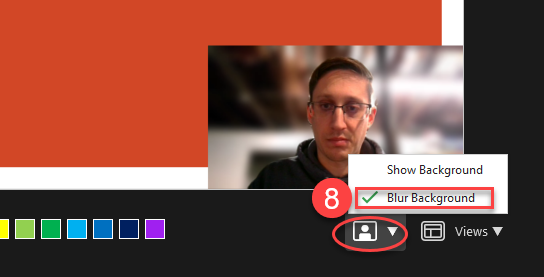
8. If your webcam is enabled, you can blur the background from the selection in the bottom right.
9. You can draw on the slides using the tools and colors along the bottom.
10. You can change views to hide your notes by selecting the Views button in the bottom right.
11. You can advance to the next slide or return to a previous slide using the arrows in the bottom left.

11. When you're ready to begin recording, click the record button at the top.

12. Click the stop button when you are finished recording.

13. If you need to re-record a slide or the whole presentation click the Retake Video button and select On Current Slide or On All Slides.

14. If you want to clear recordings click ... and select to Clear Recordings On Current Slide or On All Slides.

15. When you're finished recording, click Export at the top.

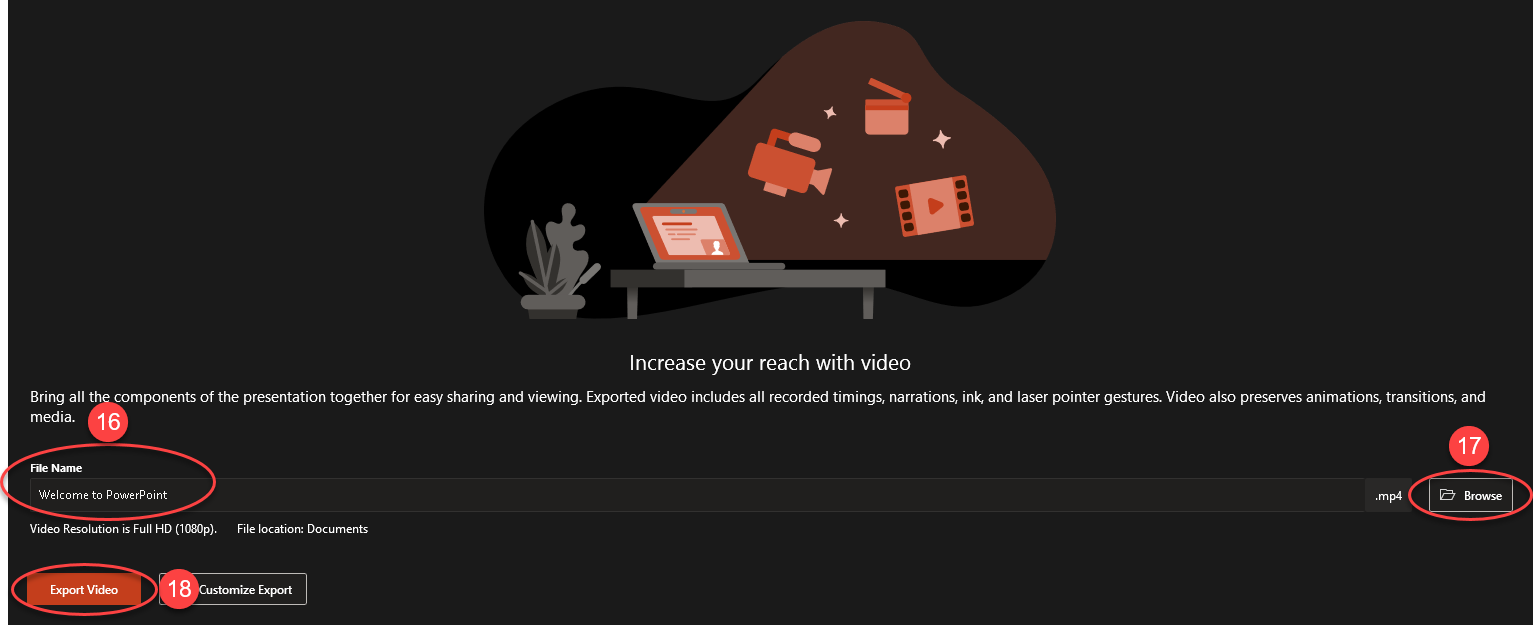
16. You will now save your presentation as an MP4 file by giving the file a name.
17. Select a location to save the file by selecting Browse.
CAUTION - We recommend selecting a location on your local drive (C: Drive, Desktop, etc.). Once the file is finished rendering you can move it to your OneDrive or a Network drive if you prefer to store it there.
18. Click Export.
Important Note: Make sure you also keep a copy of the presentation as a .PPTX file so that you can easily make changes to the presentation in the future and re-save as an MP4 without having to re-record the whole thing.
Common practice may be to save these 3 items for each presentation you record:
1) A .PPTX version without narration to post to D2L for students.
2) A .PPTX version with narration that you can easily edit at a later date if you need to update information on a slide.
3) An .MP4 version to upload to Panopto.
It may take a while for the video to process, depending on how long the recording is. The status bar will give you an indication of how long it will take.

During this time, PowerPoint must remain open, but you may minimize it and continue to use your computer. Or lock your computer (Windows key + L) if you need to step away without interfering with the process. Avoid logging out of Windows or shutting down your computer until the process is complete.
When finished, you should see this message.

Once the .MP4 is finished processing, you can upload the file to Panopto using these steps:
- Navigate to the desired Panopto course folder.
- Click the Create button.
- Click Upload Media.

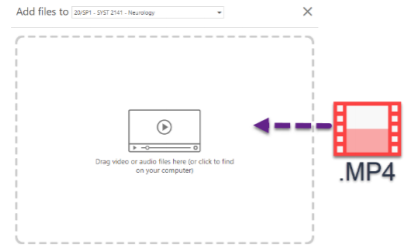
- Drag the file into the dotted box.
- Wait until you receive an Upload complete message and then you may close out of Panopto.
