Avigilon Client Install
Install Avigilon Client and Configure
This document will walk you through installing the Avigilon client software and adding the DMU server information for access to the DMU security / proctor cameras.
Requirements:
- You need to be connected to the on-campus network or be connected through VPN
- Windows computer
Install Avigilon Software
You will need to be on campus or on VPN to install.
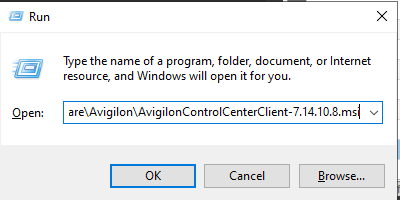
1. Press the Windows key + R to open the Run box.
Copy and paste the following text into the box:
\\dfs-dsm\#tera7\software\Avigilon\AvigilonControlCenterClient-7.14.10.8.msi and click OK
2. Click OK and RUN on the Windows security prompts
Install Wizard will now begin
3. When prompted click Next
Installer may need to install DirectX 9.0c
After DirectX 9.0c is installed the wizard will proceed with installing the Avigilon Control Center Client
When installation is completed;
Avigilon Client will now open
Configure DMU Server and Log in
1. Click the Find Site… button
2. Enter the following information when prompted:
-
IP Address/Hostname: AVIGILONACC.dmu.edu
-
Base Port: 38880

3. Click OK
You will now see the Server "AvigilonACC" on the Site list.
Login
1. Click AvigilonACC from the Site list to logon
2. Enter your current DMU username and password
- [username]@dmu.edu
3. Click Log In
