Word - Staple/Collate/Hole Punch, Individual Mail Merge Records in Word
There is a limitation in MS Office with Mail Merge printing that will not allow for the stapling of individual records that are merged and sent to the printer. Word/Office will send the prints as 1 job, instead of 3. This means the printer will only staple the 1 job (all pages) together. For example, if you have a 10 page packet that is being setup for 5 different people, Word will send this is as one 50 page print job and staple all 50 pages.
The solution is to use a Macro that will that tell Word to send each record as an individual print job. This means that 10 page packet for 5 people would send as 5 separate 10 page print jobs and staple each one.
The steps below will walk you through Creating the Macro and Running the Macro.
Creating the Macro
1. Open Word
2. Click the Developer tab
-- (If you don't see the Developer tab Go to File > Options > Customize Ribbon > Check the box for Developer)
3. Click Macros

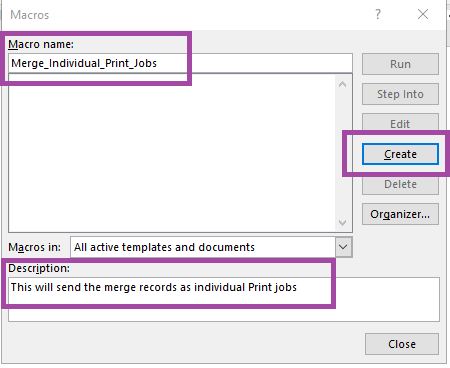
4. Fill in the Macro Name and Description
- name: Merge_Individual_Print_Jobs
- description: This will send the merge records as individual Print jobs
-- (the name and description can be different than the above, however some characters may not be allowed in the Name field)
5. Click Create

Once you click Create, the Microsoft Visual Basic for Applications (VBA) screen will appear.
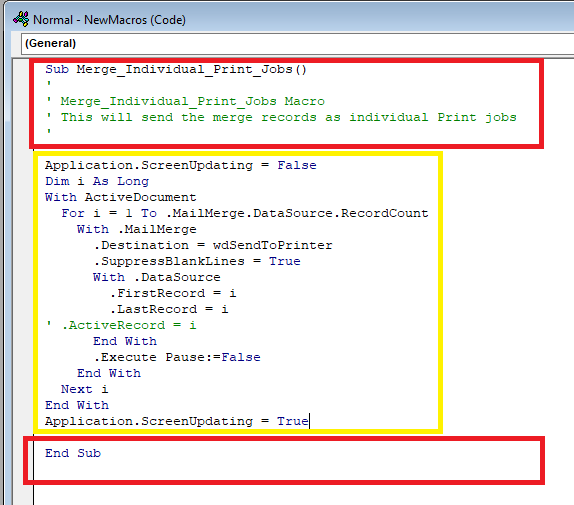
6. Copy/Paste the following text under the green Commented text and above the blue "End Sub" text.
Application.ScreenUpdating = False
Dim i As Long
With ActiveDocument
For i = 1 To .MailMerge.DataSource.RecordCount
With .MailMerge
.Destination = wdSendToPrinter
.SuppressBlankLines = True
With .DataSource
.FirstRecord = i
.LastRecord = i
' .ActiveRecord = i
End With
.Execute Pause:=False
End With
Next i
End With
Application.ScreenUpdating = True
7. Verify the screen now looks like the one below. It is important that you do not change the text at the top and bottom, these are the red boxes in the picture. The pasted text should be located where the yellow box is in the picture.

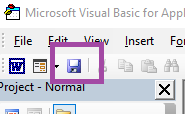
8. Click the Save icon in the upper left

9. Close the VBA window (upper right X)
=======================================================================================================================
Running the Macro:
There is no option to change print options after running the Macro, so you will need to set your print options prior. The best workflow follows the steps below:
1: Create the Mail Merge
- This is your normal procedure for creating any mail merge document
2: Set the printer preferences
- Go to File > Print
- Set the duplexing, stapling, hole punch, collating options.
- DO NOT CLICK PRINT
Step 3: Run the Macro
- Go to the Developer Tab
-- (If you don't see the Developer tab Go to File > Options > Customize Ribbon > Check the box for Developer)
- Click Macros
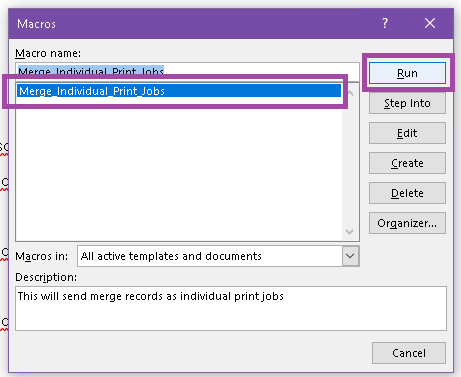
- Select the "Merge_Individual_Print_Jobs" macro
- Click Run

Word will now process the records and send the print jobs individually. When done, go to the printer, badge in, and Release All.