Perceptive Content - Print in Color using the ImageNow Printer
ImageNow: How to print in color with an ImageNow Printer
Description
To print in color with an ImageNow Printer is done in 2 steps: 1. Update the INI file 2. Update the Printer Preference to Color.
Automated:
While On Campus or connected to VPN do the following:
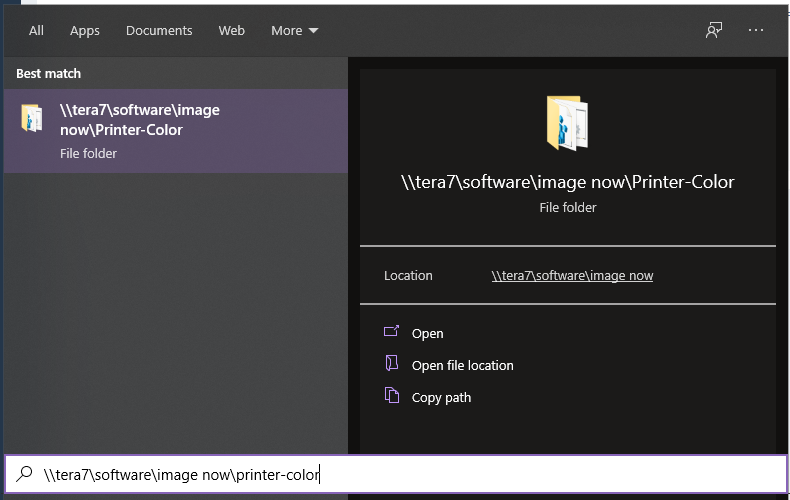
1. Click your START button and type in this path \\dfs-dsm\#tera7\Software\ImageNow and press enter

2. Copy the Printer-Color folder to the Desktop.
3. Right-Click the Update-PrinterColor.bat file and Run as Administrator

4. Follow the prompts and complete.
==================================================================================================
==================================================================================================
==================================================================================================
If you need to do this manually here are the steps:
Step 1: Manual INI Change
To configure the ImageNow Printer to print in color without adding an additional printer installation, do the following:
1. Go to the [drive]:\<Program Files or Program Files (x86)>\ImageNow\etc folder,
and then open the inowprint.ini file in a text editor.
2. Under the [Compression] section, remove the asterisk before [Compression]
if one is present, and then update the following settings to the listed values:
Note: Unlike previous versions of Perceptive Content, version 7.1.3 and higher
does not have a [Compression] section in the inowprint.ini file.
The compression values are listed under the [Tiff File Format] section.
Additionally, the Color reduction and Dithering method settings are moved to
the [Save] section in these newer versions.
Color reduction=color
Dithering method=Halftone
BW compression=Group4
Color compression=Medium quality JPEG
Indexed compression=Packbits
Greyscale compression=Medium quality JPEG
3. In Perceptive Content 7.1.3 and higher, remove the asterisk before [Devmode settings].
4. Save and close the inowprint.ini file.
5. Open Windows "Printers & Scanners" or "Devices and Printers" (depending on Windows
version).
6. Right-click "ImageNow Printer", and then click "Printing references".
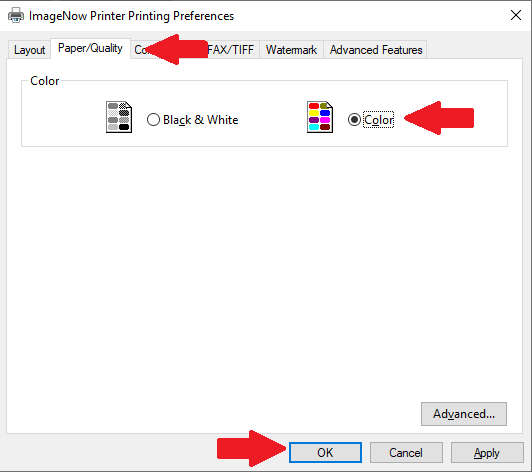
7. Click the "Paper/Quality" tab, and then select "Color".
8. Click "Apply", and then click "OK".
TIFF files with LZW compression cannot be annotated in the Perceptive Content or ImageNow Client. Color and Greyscale should be set to Medium quality JPEG instead of LZW to allow for annotations.
Step 2: Manually Update the Printer Preferences
1. Click START and go to Settings > Devices > Printers and Scanners > Printers
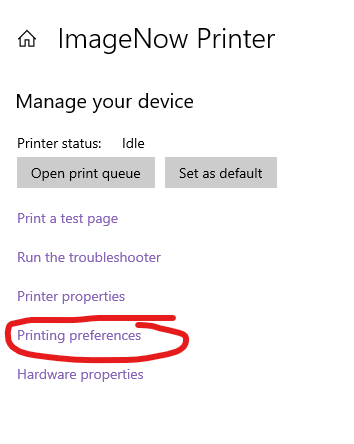
2. Find the ImageNow Printer and select it then Manage
3. Click Print Preferences

4. Click the Paper/Quality tab and Choose Color then OK
