How to Make a Room Reservation in Outlook
Room reservations for employees can be made in Outlook. This article walks you through making a room reservation from the Outlook desktop application.
Instructions
-
Open your Outlook calendar (either a personal calendar or a shared calendar, wherever you want the meeting to live).
- Click New Meeting from the top toolbar.
-
Add meeting details: title, attendees, date, and time.
-
Add a location using one of the two options below.
- If desired, you can also create a Zoom meeting using the Outlook add-in before sending your meeting invite.
- Double-check your meeting details, and click Send when you're ready. You'll receive an email when your room request has been approved. [In-policy requests for rooms that don't require approval will be automatically approved. View a list of rooms and their approval policies.]
Option 1: I Know Which Room I Want
- Click into the Location field and start typing the room number.
- If your desired room shows as available, click to select the room, which adds it to the Location, as well as the list of required attendees.
- If your desired room(s) are unavailable, follow the steps below for using the Room Finder to locate an available space.
Option 2: I Need Help Finding an Available Room
- Click the Room Finder button to the right of the Location field.

- Select the Building, and optionally other filters, to narrow down the room list. Matching rooms will automatically display, along with basic room information and availability for your meeting time.

-
Click to select a desired room that shows as available to add it to the Location field.
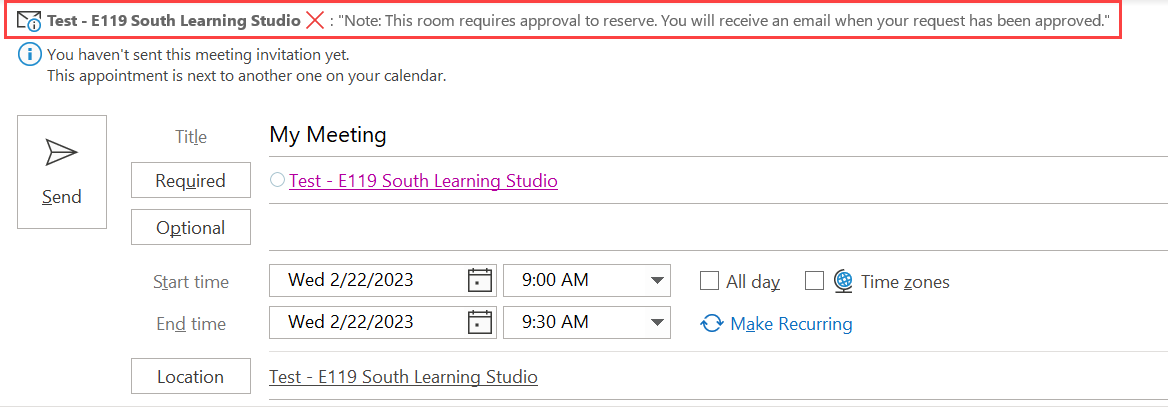
Note: Some rooms require approval, which will be indicated by a red X and help text at the top of the meeting window after you add a Location.
Helpful Tips
- The Room Finder will default to recent or frequent Buildings, but you can manually select a different building.
- Click into the location field to view quick suggestions based on your most recent and most frequently reserved rooms.
- When removing a room from your meeting request, be sure to also delete it from the Required attendees list.
Related Resources
Room Reservations Video
Schedule a Zoom Meeting using the Outlook Plug-in