Extended Monitor Setup - Two or more screens
This article is intended to guide you through setup and configuration of multiple screens. Instructions for both Windows and Mac devices are included.
Windows Instructions
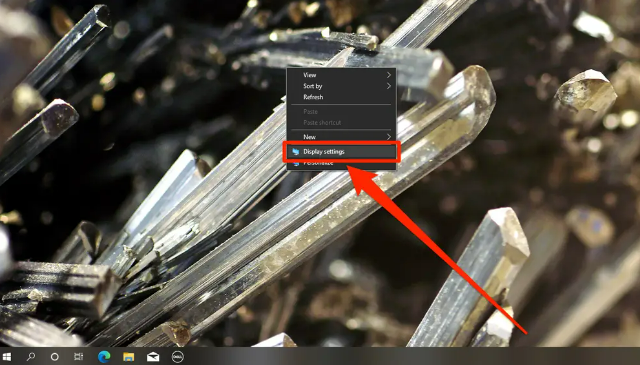
- After attaching desired external displays, right-click on an empty part of the desktop and a drop-down menu will appear.
- Click on Display Settings.
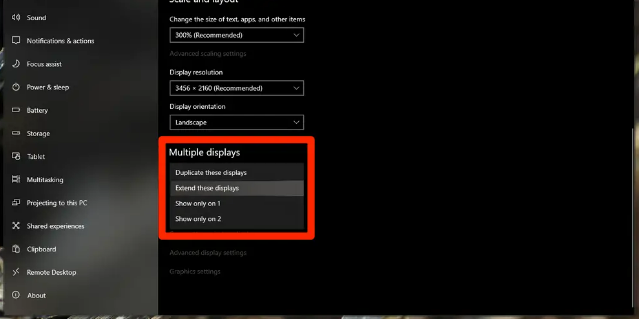
- Scroll down to the Multiple Displays option, open the drop-down menu, and choose how you want the monitors to work.
-
Extend these displays (recommended): You can set your screens up so that they display different items and your mouse cursor can move between them.
-
Duplicate these displays: This option will show the same image on both screens, which can be useful for PowerPoint presentations and lectures.
-
Show only on 1: Select this if you only want to use the primary monitor.
-
Show only on 2: Select this if you only want to use the secondary monitor.
- Once you've picked an option, click Keep changes.
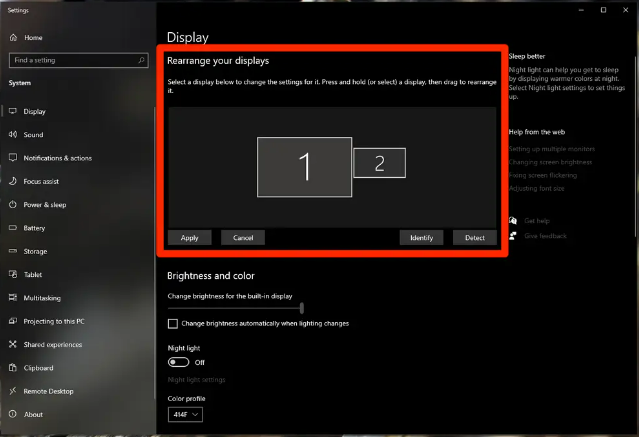
- If you chose the Extend these displays option, scroll back up to the Rearrange your displays section. Your main monitor will be listed as "1", and your new monitor will be listed as "2". Click and drag them around to match their arrangement in your office, then click Apply.
Mac Instructions
- After attaching desired external displays
- Open the System Preferences app -- you can click the Apple logo in the top-left corner of your screen and open it from there -- and select Displays.
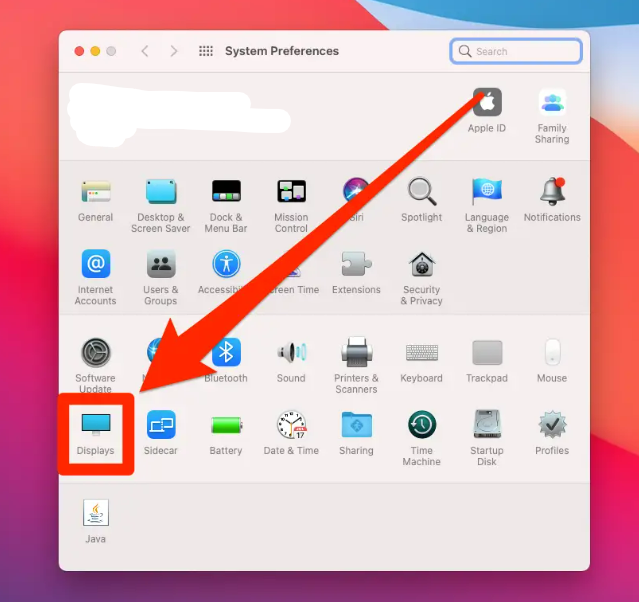
- Two windows will open, one on each display. The window on your main display will have more options -- use this window and click Arrangement at the top.
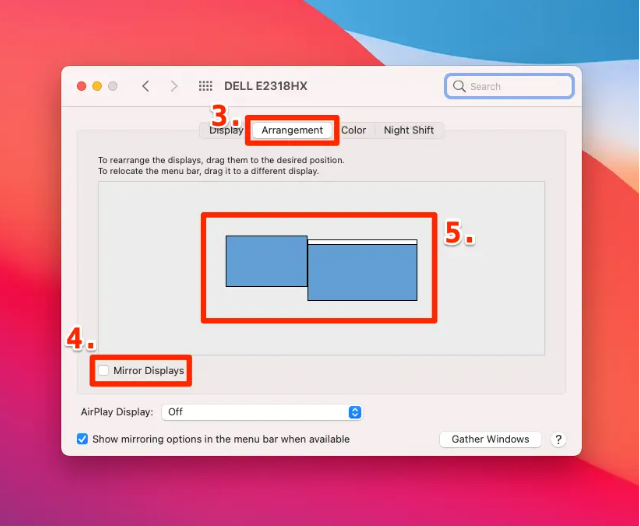
- If you want all monitors to show the same image, check off Mirror Displays. If you want them to work separately (recommended), uncheck it.
- Click and drag the blue boxes to match the arrangement of your monitors in your office. You can also click and drag just the white bar to pick which monitor has the Dock -- this will be your main monitor.
